General tab on the EcScan control's properties page
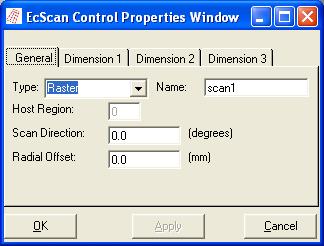
When the EcScan control's properties page opens it appears as shown in the Figure below. It is a tabbed dialog box. Use the tabs to gain access to different properties.
Use the General tab to set the scan's overall parameters, like Name and Type. Choose the scan's Type from the pull-down list. The choices are:
Not all types of scans will be available for the selected work-piece. For example, you can only use Cylindrical scans for cylindrical work-pieces.
General tab on the EcScan control's properties page
For planar work-pieces the Host Region, the region with the probe, is assumed to be region 0. For tubular objects, the host region can be region 0, the centre, or the outermost region.
The Scan Direction and Radial Offset allow you to offset the scan from the origin, which is normally where the defect is located. For Pivot scan types, these parameters are used to determine where the pivot point for the scan is located. For example, for the Pivot scan shown in a previous Figure, the Scan Direction was -90 degrees and the Radial Offset was -20mm.
Use the Dimension tabs to set the primary, secondary and tertiary
scan directions (if they are appropriate to the scan). For Cylindrical and Lift-Off
scans only the Dimension 3 tab will be shown.

Dimension tabs on the EcScan control's properties page
If the probe and defect are symmetric and the Dimension starts at the origin,
the Symmetry form appears and shows the symmetrical extent of the scan for the
current dimension. This symmetry box will not appear if the scan in that dimension
is not symmetric, for example, Dimension 3 (lift-off) in a Raster scan type.